Tuesday, 15 July 2014


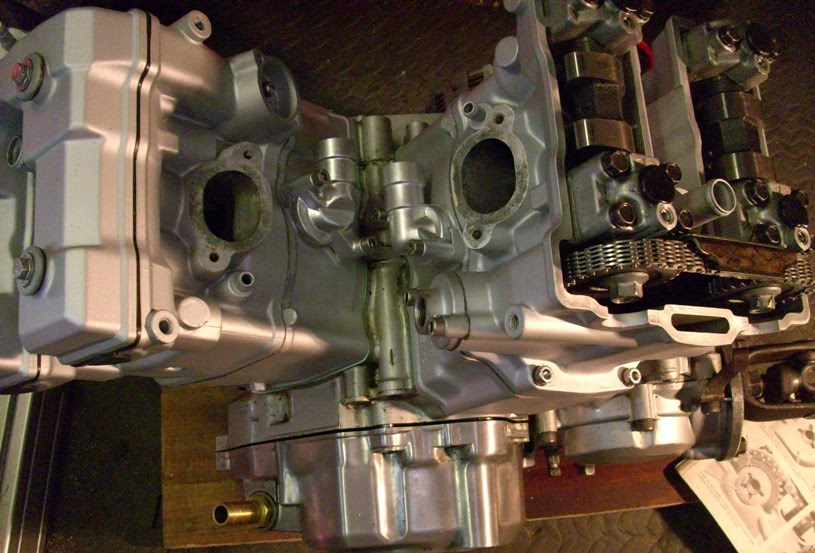
Milky oil eventually lead me to pressure test the rear cylinder head after finding the cam chain had been rubbing against it.


A light line across the blue spot is the leak from the head.


From the spare engine I reclaimed the rear head. Pressure testing showed no leaks so a clean up and size check will follow.

Sunday, 24 April 2011

Handlebar switches.

With the bike reliably up and running I turned my attention to smaller details.
The switch gear although perfectly functional looked tired with faded paint and worn off lettering.
From my box of spares I stripped the left and right switches.
These were primed and sprayed with a satin black.

The sheet was bought from ebay 3mm high to match the original which is rubbed onto the surface to make up the lettering.
The 2 pictures below show the finished lettering.
Both sides were given several coats of clear lacquer sprayed in a way so it remain a satin finsh.

The clip that holds the throttle cable in place was a bit rusty so I made a new one from a piece of stainless sheet.
The last picture shows the internals re-assembled and the switches back on the handlebar.


Saturday, 8 January 2011

Overlooking Godrevy in Cornwall UK

With a few more updates on the bike I took it out for a ride between Christmas and new years day to Godrevy, a couple of miles away from where I live. I took a camera along to take some decent pictures but the batteries died when I tried to take some. I ended up using my phone, hence the poorish picture quality. The top picture is looking back along the beach back to Hayle with surfers just behind the bike which are overexposed and don't show in the picture.
The lower picture has Godrevy lighthouse in the background


Wednesday, 28 July 2010

Turntable.

Here's a couple of pictures of the underside of the turntable to show its workings.
The blue base is a piece of medium dentisty fibre board, which just happened to be painted blue.
The joist has a piece of wood cut to fit the groove and a piece of aluminium bolted to the side for the side stand.
The turntable turns on universal roller bearing houses.

The whole thing pivots on an M16 bolt which is self tapped into the wood floor.

Monday, 21 June 2010

The finished XZ550 on my shed turntable.

This will not be the last post but it does show the finished bike on my shed turntable.


Sunday, 30 May 2010

Petrol tank before repainting

Here's a few pictures of the tank before it went to the sprayers.


Looking at the underside the paint looked quite good and shiny.
Unfortunately under all the paint was a slight bit of surface rust.

So before going to the sprayers I stripped the paint as below, further after with various abrasives I got the underside gleaming like new, but I forgot to take a picture of that.

Using up the last bit of stripper I took some of the paint off the top.
The top didn't have anywhere near the amount of surface rust on it.

It then went to the spayers the next day to be given a new coat of metalic blue.

Wednesday, 5 May 2010

Air box flapper and fuel filter.

On UK bikes of this type the air box has a weighted flap on the air intake.
This helps to stop the a stutter when accelerating ( apparently ).
The rubber hinge had perished as in the photo.

A new hinge was cut and secured with stainless screws instead of rivets.


Next on the list is an essential thing for a 28year old bike is a fuel filter.
I purchased a quality filter but needed a bracket to support it due to its weight.
I'm using a stainless plate that I had from a previous bracket.

A vertical cut and a drilled hole finishes the bracket.

A small circular clampl holds the filter.

A piece of rubber pipe protects the filter glass from the clamp.

The backet in place fitted to the side of the carburetor connected with new rubber tube and pipe clips.

Monday, 19 April 2010

Engine rebuild

Time to put all the refurbished parts back together.
New gaskets go on under the cylinders.

Cylinders with top gaskets new seals etc, etc

The timing mark lined up to get the cam in the camchain in the correct location.

Cam chains in their correct location, I couldn't get a picture of the markings, but they're in the Haynes manual.

Finally the cam chain tensioner gets put in to get the correct tension.

Cylinders back on and all torqued down.
Intake boots with rubber gaskets instead of card ones supplied in gasket set.
Engine now ready to put back in the frame.

I have at this time got the bike back together and have started her up, just need more time spent on this blog bringing it up to date, more pictures to follow , keep tuned folks.

Tuesday, 6 April 2010

Regulator/Rectifier relocation.

With the heat build up of the R&R beside the exhaust manifold I decided to relocate it in fresh air. I used a bit of stainless plate cut and drilled to shape.

The plate with the R&R on the back of it.

The R&R bolted to the plate with stainless dome head nuts to finish it off.

The R&R and bracket in place on the bike. Its bracket is fixed on the engine mounting bolt which I remade with threads each end rather than a bolt and put domed nuts on each end.

Monday, 5 April 2010

Oil filler, stator and Regulator/Recifier

I intend to put the fairing that came with my purchase on the bike but not all parts were included for the full adaption.
One part missing is the adaptor that replaces the oil filler cap that fits an oil tube which extends the filling to fairing bracket.
I can't find anything close on ebay so I had to find something else.
I did find a 1/2" BSP tail fitting on ebay which is a fairly standard part for hose fittings.
Only problem is the thread in the casing is metric so this was tapped out to 1/2" BSP.


The fitting as it came from ebay, fairly cheap as a used item.

The fitting screwed in place. It has now been shortened, I'll post another picture with the hose attatched when I've taken one.


The connections and sleeving on the internal engine electricals get updated next.
I bought a 3 way waterproof electrical connector off ebay for the connection between the R&R and the alternator.

The connector all fitted.

A picture of the R&R which came off the bike, soldered wires and hardened sleeving needs replacing. I found on the internet that this one comes off a Yamaha XV535, original ones tend to burn out due to the heat they produce and they are loacted in an enclosed space close to the rear exhaust manifold. I'll post another section of how I dealt with that.

The finished article with new connector and heat resistant sleeving (thanks to Mike and Chris) .

The other internal electircals also get tidied up.